Vance's e-Zguide "10+ steps to creating simple HTML files"
How to use FREE hosts for your web pages
![]()
Vance's e-Zguide "10+ steps to creating simple HTML files"
How to use FREE hosts for your web pages
![]() Start over | Browse Index
Start over | Browse Index
![]() |
More on Web Presence
|
More on Web Presence![]()
This is how you sign up for web spaces
Two hosts were checked in June, 2004: Geocities and Tripod
|
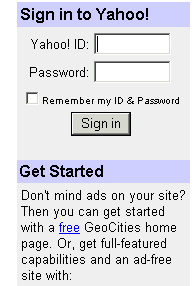
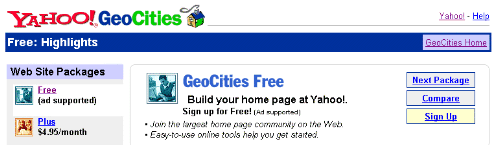
Visit http://www.geocities.com Look in the part of the screen that offers FREE web space. Click on the word Free. |
|
|
Ignore the ads for paid web space and sign up for free (ad supported) hosting. |
|
|
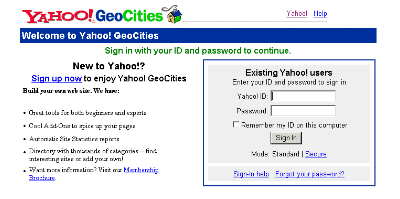
Geocities was a successful free web host that was purchased by Yahoo. One advantage to Geocities, besides offering reasonable service at no charge, is that you can start it with your existing Yahoo ID and password (assuming you have one of these - and if not, you'll have to get one at this stage if you want to continue) |
|
Once you've got your web space set up, you use the File Manager to upload the files you create to your web space (you can also use Geocities's online web page editor, but you have total control of your work if you create the HTML files on your computer, troubleshoot them there, and then upload them).
|
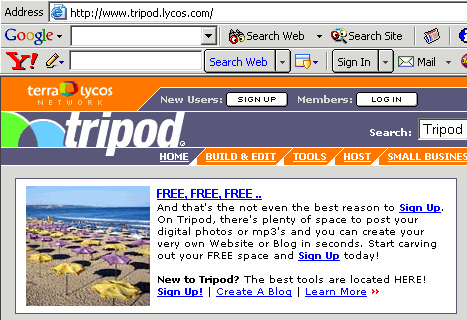
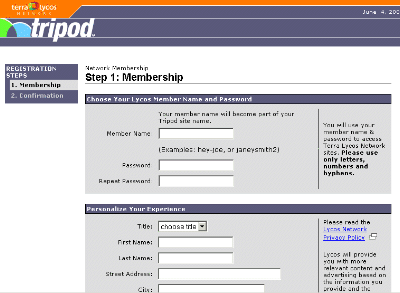
Tripod was a successful free web host that was purchased by Lycos. To sign up for free space, start here: http://www.tripod.com Look for the word FREE and sign up. |
|
|
You'll have to register online. After that it's similar to Geocities. You can upload your HTML and image files using the File Manager at the Tripod web site. A word of warning: Be very careful to examine the tick boxes. Tripod tries to sign you up for lots of spam email 'services'. Also if you tick boxes in or out and have to repeat a page, you might find that boxes you had un-checked have been ticked in for you or visa versa. So check carefully before signing up for this free service. |
|
There are many more sites offering free or nominal fee hosting services. Check out the following resources:
This tutorial has the following components:
| Step | Concept | <Tags> | |
| 1 | The basic structure tags | <HTML> <HEAD> <BODY> | |
| 2 | Putting your document title in the blue bar of the browser | <TITLE> | |
| 3 | Formatting text: getting the browser to display text in paragraph form | <P> | |
| 4 | Formatting text: breaking the text into lines with line breaks | <BR> | |
| 5 | Formatting text: bold and italics | <B> <I> | |
| 6 | Inserting images | Working with pictures on the Internet | <IMG SRC="..."> | |
| 7 | Linking to other html files in a web project | <A HREF="..."> | |
| 8 | Linking to other URLs on the Internet | <A HREF="http://..."> | |
| 9 | More text formatting: changing font size | <FONT SIZE="+1"> | |
| 10 | More formatting: centering text and images, and drawing lines across the page | <CENTER> <HR> | |
| 11 | Changing background color | Worksheet on backgrounds here (rp) | <BODY BGCOLOR="#..." TEXT="#..."> | |
| 12 | Control placement of text, images, and other elements on a page by setting up Tables. | Better page format: put tables inside tables | <TABLE BORDER="" CELLSPACING=""><TR><TD> |
Review
Extended practice
|
|
Use the navigation at the top of this page or your browser's BACK button to return to a previous page For comments, suggestions, or further information
on this page, |