For PI Comp032 and Comp082 classes
Adding Links and Pictures to your Blog Template
 |
For PI Comp032 and Comp082 classes Adding Links and Pictures to your Blog Template |
This worksheet explains how to change the template in your blog at Blogger.com so that it displays your links and pictures down the sidebar frame when your blog is displayed on the Internet.
You can click on the underscored items here --> to learn more about displaying pictures with the IMG SRC tag and making links with the A HREF tag.
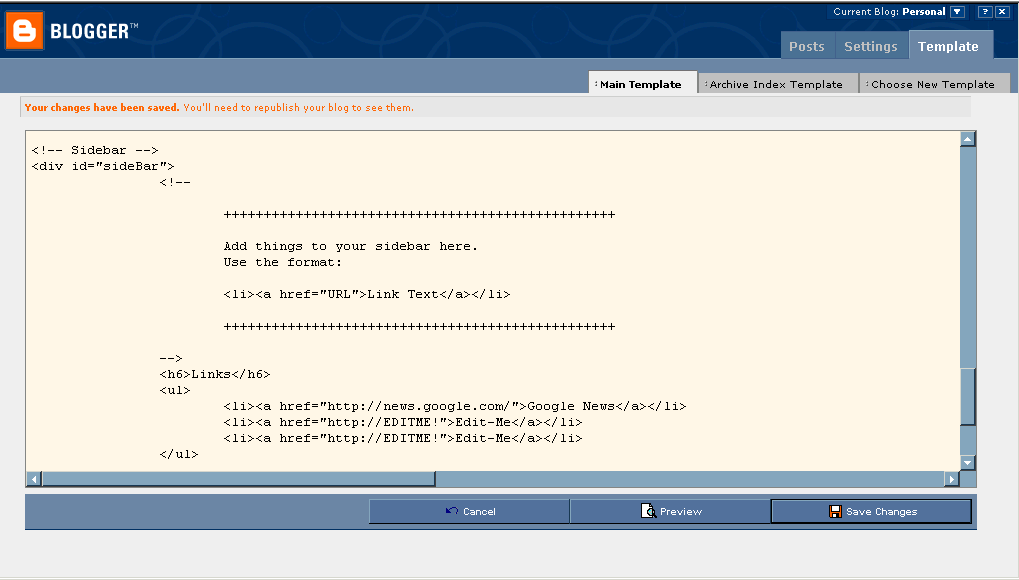
To begin, Log On to your blog and open your template. If you scroll down and if you're lucky, you should be able to find something like this:

|
Were you lucky? If you don't see where you can obviously 'Add things to your sidebar', then choose another template. Both "Jellyfish" and "Herbert" will work: NOTE: When you choose a new template, this deletes any changes you have already made to the template. Therefore, if you've already added pictures and links to your template, save your changes in a Notepad text file before choosing a new template. This affects only the sidebars you see in the image at right. Template changes have no affect on postings to your blog. Make the changes Now, to change the template, we just change things between the <LI> and </LI> tags. The LI tags make items appear in a list. You can make your changes by writing directly in the Main Template window. |
|
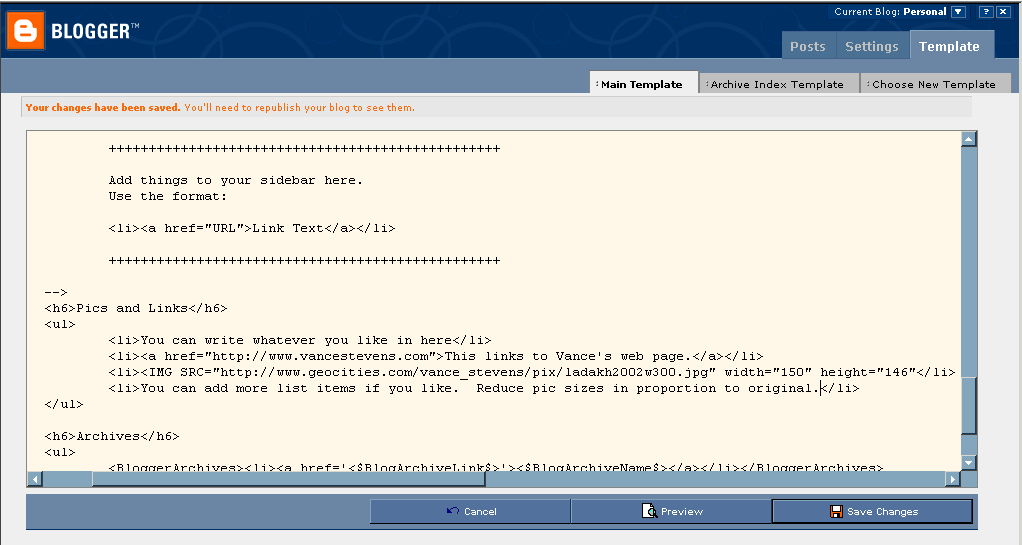
You can see below where I have made changes to my template. You can make similar changes in yours.
Note, if you right click on any photo in a browser and select Properties, you can see and copy (using Ctrl-C) the URL for that photo. You can then put that url between quote marks in <IMG SRC="http://www.etc.gif"> and it will display on your web site (as long as you remain connected to the Network server where the photo resides, of course).

Save Changes and THEN Republish your Entire Site
Saving and publishing are two different things at Blogger. You can Save Changes to your template and then Preview them to see if the result is what you expected. If not you can then Cancel your changes.
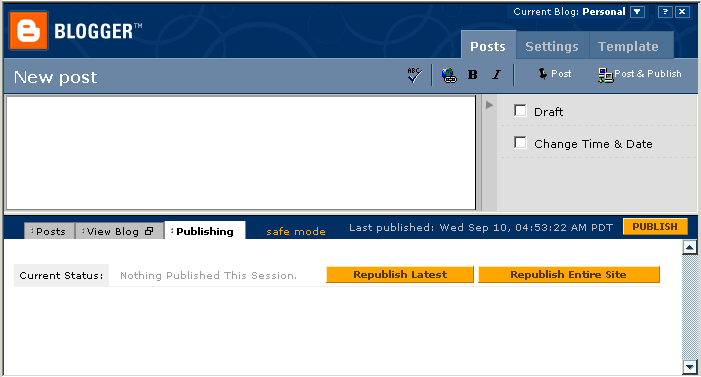
If you want the world to see your changes, you have to Republish your Entire Site. To do this:

That was easy!
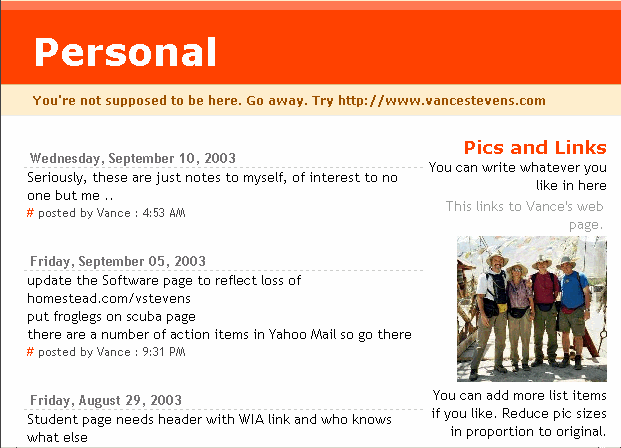
It is. And here's what the changes look like.

This update: April 20,
2004
Address questions or
comments to vstevens at pi.ac.ae http://www.vancestevens.com/